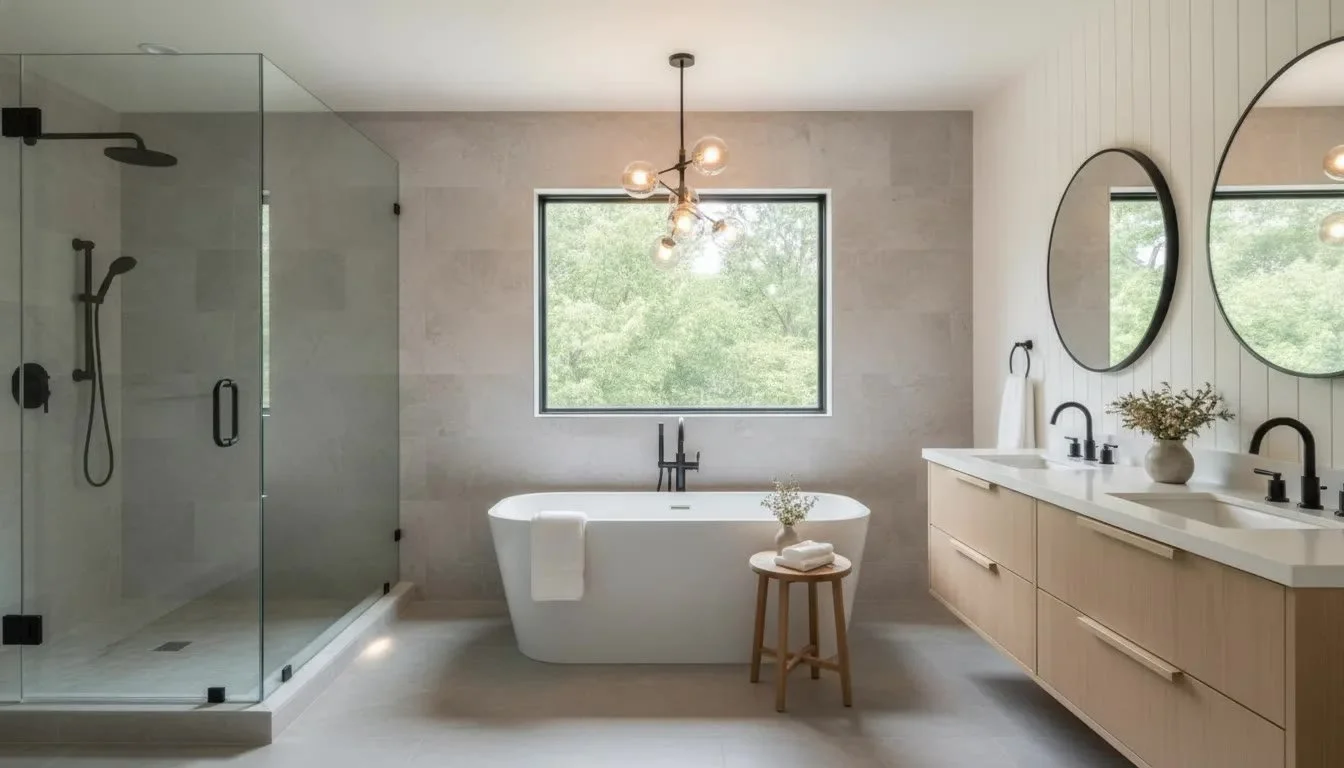
Bathroom Renovation Design: Layout, Style & Materials
If your bathroom feels cramped, hard to keep organized, or dated, a renovation can address more than its appearance. The right plan can make mornings smoother, add useful storage, and create a more comfortable place to unwind. Start by listing what you want to change and what already works. That simple exercise can help focus your bathroom renovation design and keep decisions tied to your real needs. You’ll also want to consider the room’s measurements, plumbing, lighting, materials, and budget before construction starts. This guide walks through each stage, so you can make practical choices and create a bathroom that feels at home in your house.
Key Takeaways
- Plan around daily routines: List who uses the bathroom, what they need, and which layout, storage, and accessibility features will make it easier to use.
- Set priorities before selecting finishes: Define the renovation scope, separate essentials from optional upgrades, and budget for labor, materials, lead times, and unexpected repairs.
- Coordinate details early: Verify measurements, clearances, permits, ventilation, waterproofing, and product requirements with your design and construction team to create a bathroom that functions well and suits your home.
Plan Your Bathroom Renovation Around Daily Life
A bathroom should feel considered, but it also needs to work well every day. Before choosing tile, fixtures, or paint, look at who uses the room and what they need from it. These details can guide your decisions about layout, storage, materials, and project scope.
Identify who uses the bathroom, how often, and what their routines require
Start with the basics: who uses the bathroom, how often, and at what times of day? A shared family bathroom may need to accommodate several people getting ready at once, while a guest bath may see occasional use. Consider whether anyone needs more room to move, easy-to-reach storage, or a tub for bathing children.
Think through each person’s routine, too. Would a separate sink area make busy mornings easier? Does someone prefer a long shower, or would a handheld showerhead be useful? Note what feels awkward in the current room and what would make daily use more comfortable. Houzz’s bathroom ideas offer examples to consider alongside your household’s needs and the room’s limits.
List must-haves, storage needs, comfort preferences, and design priorities
Write down the features your bathroom needs, then separate essentials from nice-to-haves. Essentials might include better lighting, more counter space, or a walk-in shower. Preferences could include a particular tile, finish, or color palette. This list helps you make decisions if the available space or budget requires a trade-off.
Be specific about storage. Toiletries, towels, hair tools, cleaning supplies, and spare toilet paper all need a place. A recessed niche or medicine cabinet can keep everyday items within reach while freeing up counter space. Include comfort and style priorities as well, such as heated floors or materials that connect with nearby rooms. Jill Rae Designs’ design process shows how clear goals can help shape a well-considered project.
Decide whether to refresh finishes, change the layout, or renovate fully
The right scope depends on what the room needs. If the layout works and the plumbing is in good condition, replacing finishes, lighting, and hardware may be enough. If the bathroom feels cramped or lacks storage, a new vanity or a revised layout may offer a better solution. A full renovation may make sense when the room needs updated plumbing, improved waterproofing, or a more substantial redesign.
Consider the trade-offs before changing walls or plumbing locations, since those decisions can add construction work and affect the budget. Think carefully about whether to keep a tub or replace it with a shower. If your household rarely takes baths, a walk-in shower may make better use of the space. Houzz’s planning ideas include examples of layouts designed around different household needs.
Balance style, function, accessibility, durability, and long-term needs
Choose materials for their appearance and how they will hold up to moisture, regular use, and cleaning. Tile, stone, and hardware can bring character to a bathroom, but each option has different care needs. Consider grout upkeep, whether stone needs sealing, and how surfaces may wear over time. Review samples in the room’s lighting before making final selections.
It is also helpful to plan for changing needs. Slip-resistant flooring, a curbless shower, or well-placed grab bars can make the room easier to use over time. These features can be integrated into a polished design when considered early. A designer can help coordinate practical details with your preferred style and the character of your home.
Check local building codes and permit requirements
Before work begins, find out whether your renovation requires permits or inspections. Requirements vary by municipality and may depend on whether the project involves plumbing, electrical work, structural changes, or finish updates. Contact your local building department to confirm what applies to your home, along with any applications or project documents you’ll need.
For homes in Ridgefield, the town’s Building Department is the place to check local requirements. If your home is elsewhere in Fairfield County or Westchester County, contact the relevant municipality, since rules can differ between towns. Confirming permit requirements early gives your designer and contractor time to account for approvals and inspections in the project plan.
How Do You Plan a Functional Bathroom Layout?
A functional bathroom layout starts with the people who use it. Think about how many people share the room, when they use it, and what their routines involve. A bathroom used by several family members may need a double vanity or more privacy, while a smaller space might work best with a compact shower and well-planned storage. Consider both your current needs and how they may change over time.
Next, look at the room itself. Windows, doors, plumbing, electrical connections, and structural features can affect where fixtures fit and which changes are practical. A layout should account for comfortable movement as well as the construction needed to make it work. Before making structural or plumbing changes, ask your design and construction team to review the home and confirm local permit requirements. Jill Rae Designs’ renovation process brings design planning and construction coordination together, helping homeowners connect their goals with the details required to complete the project.
Finally, plan the room in zones. Group bathing, grooming, and storage needs, then check how people will move between them. The steps below can help you create a layout that feels natural, supports daily routines, and suits your home.
Measure the room, including walls, ceiling, doors, windows, and fixtures
Start with accurate measurements of every wall and the ceiling height. Record the size and position of doors, windows, and existing fixtures, and note which way each door swings. Include anything that projects into the room, such as a radiator, ledge, or built-in cabinet. These details can affect whether a vanity drawer opens fully or whether a shower door has room to move.
A sketch can help you organize the information, but have measurements verified before construction begins. Mark outlets and switches if their locations are known, and take photos from several angles. Share these details with your designer or contractor before choosing fixtures. A complete record gives the team a reliable starting point and helps them assess what will fit comfortably.
Note plumbing, structural details, and features that may affect construction
Record the locations of water lines, drains, vents, and electrical connections if they are visible or documented. Also note features such as windows, sloped ceilings, chimney structures, or walls that may affect fixture placement. Some conditions are hidden behind walls or beneath floors, so a contractor may need to investigate them before confirming the project scope.
Keeping fixtures near existing plumbing can limit rerouting, though the layout still needs to suit your household. Ask your design and construction team to review structural conditions, waterproofing needs, and local permit requirements early. Jill Rae Designs explains how its team coordinates project decisions in its renovation process. Reviewing these details before choosing finishes helps align the design with the home and the work required.
Divide the room into bathing, grooming, and storage zones
Group bathroom features by the tasks they support. The bathing zone includes the tub or shower, along with nearby towel storage. The grooming zone centers on the vanity, mirror, lighting, and outlets. Keep storage close to where items are used: toiletries near the sink, for example, and bath linens near the shower.
Zoning can make a shared bathroom easier to use. If the floor plan allows, place the toilet or shower behind a partial wall or separate door so one person can use the sink while another has privacy. In a smaller room, zones may overlap, so choose fixtures and storage that make efficient use of the space. A vanity with organized drawers can keep everyday items accessible while leaving the countertop clear.
Allow comfortable clearance around doors, fixtures, drawers, and shower entries
Before settling on fixture sizes, check how people will move through the room. Make sure the entry door, vanity drawers, cabinet doors, and shower door can open without colliding or blocking the main path. Consider where someone will stand to use the sink, step out of the shower, or reach for a towel. These everyday movements can reveal issues that are easy to miss on a floor plan.
Local codes may set minimum clearance requirements, so confirm them with your design professional or contractor. For added comfort, consider whether the room needs more space than the minimum, especially if several people share it. If the plan feels crowded, options such as a pocket door, a different shower-door style, or a narrower vanity may help. The aim is a room where fixtures fit and movement feels easy.
Choose a tub, walk-in shower, or combination based on household needs and space
Choose bathing fixtures based on who will use the bathroom and how. A tub can be useful for bathing children or for anyone who enjoys soaking. A walk-in shower may be a better fit for people who prefer a quick, easy-to-enter option. A tub-and-shower combination can support different routines when space is limited or the bathroom serves several people.
Think about how each option affects the rest of the layout, including storage and vanity space. If your household rarely uses a tub, replacing it with a shower may leave room for a larger vanity or linen cabinet. If you are renovating the home’s only full bathroom, keeping a tub may better serve your needs. Review the trade-offs with your designer before finalizing the plan, and check that the selected fixture fits the room and your long-term plans.
Consider curbless showers, slip-resistant flooring, and grab bars for accessibility
Accessibility features can make a bathroom more comfortable and easier to use for people with different mobility needs. A curbless shower reduces the step at the entrance, while flooring designed for better traction can help provide footing in wet areas. Grab bars can offer support near the shower or toilet. With early planning, these features can be incorporated into a cohesive design.
Curbless showers require careful attention to drainage, floor slope, and waterproofing, so review the details with your contractor. Ask about how flooring performs when wet and what care its surface and grout require. If grab bars may be useful now or later, plan for appropriate wall support before the walls are closed. The U.S. Access Board’s accessibility guidance offers useful information, but confirm which requirements apply to your home and project with qualified professionals.
Make a small bathroom feel more open with clear shower glass, a floating vanity, and a well-sized mirror
In a small bathroom, clear sightlines can help the room feel more open. Clear shower glass lets the eye travel across the space, while a floating vanity leaves more floor visible. A mirror sized to suit the vanity can reflect light and add a sense of depth. These features work best when the layout also leaves a comfortable path between the door, sink, and shower.
Choose storage that keeps essentials close without taking up too much floor space. Recessed shower shelves, a mirrored medicine cabinet, or a narrow wall cabinet can help organize daily items. Good lighting can make the vanity and shower easier to use, too. Before selecting products, check their dimensions against the plan, including how doors and drawers open. In a compact room, a few well-considered choices can serve both practical and visual needs.
How Do You Set a Realistic Bathroom Renovation Budget?
Start with the room’s needs and the scope of work. A refresh that keeps the existing layout will have different costs from a renovation that moves plumbing, replaces fixtures, and changes the room’s structure. List what you hope to improve, then identify the design, materials, labor, and related work needed to achieve it. This gives you a clearer basis for discussing estimates and weighing options.
It also helps to understand how design decisions and construction planning connect. Jill Rae Designs outlines its approach to project planning in its design process. Whether you’re working with a design firm or coordinating the project yourself, confirm what each estimate includes, ask how changes are handled, and keep your priorities visible as you make choices. A thoughtful budget leaves room for the details that matter most to your household, while preparing you to make practical adjustments if costs or site conditions change.
Estimate design, materials, labor, and related costs
Build your estimate around the full scope, not just the visible finishes. Include design services, demolition, plumbing, electrical work, waterproofing, installation, materials, and disposal. Remember details like lighting, mirrors, hardware, paint, and storage, which can add up when they are left out of an early estimate.
Measure the room and note what you plan to keep, replace, or relocate. Ask contractors or your design team to explain what each proposal covers, so you can compare estimates on equal terms. Houzz recommends accounting for available space, storage needs, desired materials, and likely costs before starting. Its bathroom planning ideas can help you identify details to discuss when building your project scope.
Separate essential improvements from optional upgrades
Write two lists: work the bathroom needs and upgrades you would like if the budget allows. Essential items might include fixing leaks, improving ventilation, replacing damaged surfaces, or making the shower safer to use. Optional upgrades could include heated flooring, specialty tile, a freestanding tub, or custom cabinetry. This distinction makes it easier to prioritize if estimates exceed your target.
Set a preferred spending range and a firm maximum, then rank optional features by their value to your household. If the layout and main fixtures work well, a focused refresh may meet your goals without a full renovation. New paint, linens, or accessories can change the feel of a room, as Houzz notes in its bathroom ideas. Decide which improvements are worth doing now and which can wait.
Compare materials by price, installation, upkeep, and lifespan
Compare the full cost of a material, not only its purchase price. Ask how much it costs to install, whether it needs sealing, and how much care it will require over time. A less expensive finish may need more frequent maintenance, while a higher-priced option may last longer or better suit how your household uses the room.
Moisture resistance is essential, especially near showers, tubs, and sinks. Check product specifications and care instructions, and confirm that a material is appropriate for its intended location. Natural stone can add character, but it needs suitable sealing and care. The bathroom materials guidance also recommends checking reviews and product details before buying. Include installation and maintenance in your comparison to get a more useful picture of value.
Prioritize durable fixtures and surfaces you use often
Give careful consideration to the items you use every day, such as faucets, shower fittings, the vanity, and flooring. These surfaces face regular water exposure, cleaning, and wear, so performance matters alongside appearance. Ask your design or construction team how the options you’re considering hold up in a busy household and what care they require.
Think about maintenance before choosing a finish. Porcelain and ceramic tile are durable options for many bathrooms, while natural stone can need regular sealing. For floors, check slip resistance; for tiled surfaces, consider how grout will be cleaned. The bathroom renovation materials video discusses durability, moisture, and upkeep. Matching materials to your routines can help you spend thoughtfully on the features that see the most use.
Keep functional plumbing locations when they support the design
Moving a toilet, sink, or shower may require additional plumbing work. If the existing locations serve your household well, keeping them can help reserve more of the budget for lighting, storage, or finishes. But there’s little value in preserving a layout that makes the room difficult to use. Compare the cost of keeping the plumbing in place with the practical benefits of a new arrangement.
Consider how many people use the bathroom and when. A tub-and-shower combination can meet different needs, while separating the toilet or shower from the sink may let more than one person get ready at once. Houzz’s bathroom layout ideas offer examples of planning around space and household routines. Ask your project team to estimate both options before deciding.
Set aside contingency funds for issues behind walls or under floors
Renovations can uncover hidden problems after walls or floors are opened. Water damage, outdated plumbing, or structural concerns may need to be addressed before new finishes can be installed. Set aside contingency funds within your overall budget to handle necessary repairs without sacrificing essential parts of the renovation.
Ask your contractor or design team what hidden conditions are most likely in your home and how unexpected work will be reviewed and priced. Before construction begins, confirm measurements and check that large items can fit through doorways, hallways, and stairs. These steps help you prepare, though they can’t reveal every issue concealed behind a wall or under a floor. The renovation planning video also recommends measuring carefully and checking product dimensions before ordering.
Account for product lead times and changes during construction
Some tile, cabinetry, fixtures, and glass doors take longer to arrive than standard products. Confirm availability and delivery estimates before scheduling installation, particularly for items that could delay other work. Account for ordering, delivery, inspection, and time to resolve a damaged or incorrect shipment. Your design or construction team can help identify which selections need to be finalized early.
Changes after work starts can affect both cost and timing. Before approving a different product or revising the plan, ask how the decision will affect the budget, installation sequence, and other scheduled work. Agree on a clear process for reviewing and approving changes so everyone understands the next steps. Jill Rae Designs describes its approach to planning and coordination on its process page, which can help you understand how project decisions fit into a full-service renovation.
Create a Cohesive Bathroom Design
A cohesive bathroom brings its finishes, fixtures, lighting, and details together in a way that suits both your home and daily routines. Start with the overall look you want, then consider how each choice relates to the others. A considered palette and a few repeated materials can help the room feel polished without making every element match.
Choose a clear style and a complementary color palette
Before selecting tile or paint, decide how you want the bathroom to feel. A traditional home might suit classic shapes and warm neutrals, while a contemporary space may call for clean lines and a simpler palette. You do not need to follow one style strictly, but having a clear direction makes it easier to compare options.
Choose a small group of colors to guide your decisions. Soft white, warm wood, and muted green can create a calm palette; pale stone with dark hardware offers more contrast. Save examples in a Houzz bathroom Ideabook, then look for colors, shapes, and materials that appear more than once. Those patterns can point you toward a palette that feels personal and intentional.
Coordinate tile, cabinetry, countertops, fixtures, and hardware
Think of each finish as part of the same composition. If your tile has bold patterning or prominent veining, simpler cabinetry and countertops can keep the room from feeling busy. Conversely, understated tile can make space for distinctive cabinet fronts or expressive hardware. View samples together in the bathroom’s lighting before making final decisions, since colors and textures can look different at home than they do in a showroom.
Consider maintenance as well as appearance. Larger-format tile can mean fewer grout lines to clean, while natural stone may require periodic sealing. Coordinate faucet, shower, and cabinet hardware finishes, or mix two finishes thoughtfully and repeat each in more than one place. Browse bathroom design ideas on Houzz for combinations, then adapt what you like to your home and routine.
Reinforce the look with lighting and a few considered accessories
Lighting should support the bathroom’s style and make everyday tasks comfortable. Sconces beside a mirror can provide useful, balanced light for grooming, while a ceiling fixture illuminates the room as a whole. Choose fixtures that suit the other finishes, and plan their placement before construction so wiring and switches fit the layout.
Accessories can add a finished touch without taking over the room. A framed mirror, a tray for daily essentials, or coordinated towel hooks can bring in texture and reinforce a material already used elsewhere. Think about how much counter space you need to keep clear, and choose decorative pieces accordingly. A few well-placed details often feel more considered than filling every surface with matching accessories.
Carry colors, materials, and architectural details from nearby rooms
A bathroom can have its own character and still feel connected to the rest of your home. Look at the rooms just outside it: notice the flooring, trim, door styles, cabinet finishes, and dominant colors. Repeating one or two details, such as a wood tone or metal finish, creates continuity without making every room look alike.
This connection is especially useful in a primary suite, where the bathroom may open directly onto a bedroom or dressing area. Consider the view from the doorway and how the bathroom’s colors and materials sit beside those in the adjoining space. If your home has distinctive features, such as traditional millwork or arched openings, let their proportions inform your choices for mirrors, lighting, and cabinetry.
Balance current trends with your home’s character and long-term needs
Trends can offer fresh ideas, but the design should also suit your home and the people who use the bathroom. Warm colors, natural textures, and classic shapes can feel welcoming over time, while a bold tile or distinctive fixture can add personality. Consider which choices you are comfortable keeping for years and which could be changed more easily.
Prioritize lasting investment in the layout, waterproofing, ventilation, and fixtures you use every day. Bring in trend-led touches through paint, towels, or smaller accessories. If you are renovating an older home, think about how new finishes will relate to its existing character. A design professional can help connect those decisions to the wider project, as described in Jill Rae Designs’ process.
Use inspiration images to identify what you like, then adapt it to your space
Collect images of bathrooms that appeal to you, then look closely at what draws you in. It might be the stone, the contrast between light and dark, the vanity shape, or the way the shower is enclosed. Make a short list of details you notice across several images. Recurring features can help you define a style that feels personal rather than copied from one photograph.
Next, consider how those ideas will work with your room’s size, natural light, layout, and budget. A spacious bathroom in an inspiration photo may use proportions or materials that need adjusting for your space. Save relevant product details alongside your images, and share them with your designer or contractor. Inspiration is most useful as a starting point that can be tailored to the home you have.
Pair statement details with quieter surfaces to avoid competing focal points
Choose one main feature to draw the eye, such as a patterned floor, sculptural tub, dramatic stone, or richly colored vanity. Let the surrounding finishes support it. For example, a striking shower tile may pair best with simpler walls and restrained hardware. This gives the statement detail room to stand out without making the bathroom feel crowded.
Before finalizing materials, place samples together and notice where your attention goes first. If several finishes seem equally prominent, simplify the palette or reduce the number of patterns. You can still add character with smaller accents, but use them selectively. A clear focal point helps the room feel considered and makes it easier to create a consistent look across the whole bathroom.
Choose Durable Bathroom Materials and Finishes
Compare porcelain and ceramic tile for floors, walls, and wet areas
Porcelain and ceramic tile come in a wide range of colors, patterns, and sizes, but they perform differently. Porcelain is denser and absorbs less water, making it a practical choice for bathroom floors, shower walls, and other areas exposed to frequent moisture. Ceramic tile is often lighter and easier to cut, so it can work well on walls and in spaces with less foot traffic.
For floors, consider slip resistance as well as appearance. Smaller tiles can be useful on shower floors because the additional grout lines may provide more traction and help accommodate the slope toward the drain. Ask your tile supplier or installer to confirm that a specific product suits its intended location. The Tile Council of North America offers guidance on tile selection and installation, which can help you prepare questions before making a decision.
Consider natural stone, and plan for sealing and care
Natural stone brings distinctive veining and variation to a bathroom, giving the space a sense of character. Marble, limestone, and travertine each have different colors, textures, and care requirements. If you’re considering stone, view full slabs or representative samples where possible. The variation in a small sample may not show the full pattern you’ll see across a countertop or shower wall.
Many natural stones are porous and can be affected by water, cosmetics, and cleaning products. Ask your supplier whether the stone needs sealing, how often it should be resealed, and which cleaners are safe to use. A honed finish may be a practical choice for a busy bathroom, though it still needs proper care. The Natural Stone Institute’s care guidance can help you understand what upkeep a particular stone may require before you commit.
Explore warm, water-resistant wood-look tile
Wood-look tile offers the visual warmth of timber with the water resistance and durability of tile. It can suit a bathroom where you want a natural, inviting feel without installing wood in an area that gets wet regularly. Porcelain versions are widely available in plank shapes, with patterns and tones inspired by everything from pale oak to deeper walnut.
Consider the tile’s scale and layout as you review options. Longer planks can create a more continuous look, while different laying patterns can affect how prominent the grain appears. Request samples and view them in the bathroom’s lighting alongside your cabinetry and wall tile. If you plan to repeat the wood tone on the vanity or in a nearby room, vary the textures so the finishes complement one another rather than appearing too closely matched.
Choose vanity surfaces and cabinetry suited to moisture and daily use
Bathroom vanities are exposed to water, skincare products, and cleaning supplies every day, so choose a countertop that suits your routines as well as your preferred style. Quartz is a popular low-maintenance option, while natural stone offers distinctive variation and may require more care. Compare samples in person, and ask how each surface responds to stains, heat, and common bathroom products.
Cabinet construction and installation matter, too. Look for durable finishes, sealed edges, and hardware designed for frequent use. The layout should account for plumbing and provide enough clearance to open doors and drawers comfortably. A design professional can help coordinate these details with the room’s materials and overall scope. Jill Rae Designs’ renovation process brings design decisions and project planning together, helping homeowners consider how individual selections work as part of the finished space.
Check slip resistance, grout upkeep, water exposure, and long-term wear
A bathroom floor should feel secure underfoot as well as look beautiful. Ask your tile supplier or installer about the slip-resistance rating for the exact tile and finish you’re considering, especially for shower floors and other areas that get wet. Glossy surfaces can be slippery, while textured finishes may offer more grip but take extra effort to clean. When possible, view samples in person and consider who will use the room and how.
Grout also affects appearance and maintenance. The right joint width depends on the tile and installation, so ask your installer for a recommendation. Cement-based grout may need sealing, while epoxy grout can offer greater stain resistance and may cost more to install. Discuss water exposure, cleaning habits, and expected wear before choosing a tile-and-grout combination. Planning for upkeep early helps you select finishes that fit your household, not just the design scheme.
Choose shower glass, waterproofing, and grout for easy care and durability
Clear shower glass can make a bathroom feel more open and keep tile visible. Before selecting a panel or door, confirm that its size and swing work with the layout, fixtures, and nearby circulation. Protective glass coatings may make cleaning easier, but they don’t remove the need for regular care. Ask your installer which cleaners to use and how to limit residue that can build up over time.
Waterproofing behind the tile is just as important as the finish you see. Tile and grout alone do not protect a shower from water damage, so confirm how the walls, floor, niche, and drain will be waterproofed before installation begins. The Tile Council of North America’s resources explain why proper tile installation matters. Your renovation team should coordinate waterproofing, tile, and glass measurements so each component fits the space and performs as intended.
Coordinate faucets, hardware, and shower fittings for function and visual harmony
Choose faucets, cabinet hardware, and shower fittings together so the finishes feel intentional across the room. Mixing metals can add depth, but it helps to select one dominant finish and repeat other finishes as accents. For example, warm-toned faucets can work with darker cabinet pulls when the combination relates to the lighting and other details.
Make function part of the selection process. Check that the faucet suits the sink and countertop, that shower controls are easy to reach, and that the showerhead placement works for the people using the bathroom. Confirm product availability and lead times before finalizing the design, since finishes may differ between fixture collections. Reviewing the selections as a group helps you spot mismatches early and keep the room cohesive from the vanity to the shower.
Plan Bathroom Lighting, Storage, and Ventilation
Lighting, storage, and ventilation shape how a bathroom feels and functions every day. They’re easiest to get right when planned alongside the layout, not added after the fixtures and finishes are chosen. A mirror’s size affects where lights can go; a vanity’s storage depends on plumbing and clearances; and an exhaust fan needs a suitable route through the ceiling or wall. Thinking through these details early can help you make informed choices and reduce last-minute changes during construction.
Start with the routines of everyone who uses the room. Consider where you need bright, even light, what should stay within reach, and how the bathroom will handle moisture after a shower. Then coordinate those needs with the room’s dimensions, architectural details, and overall style. For a full renovation, working through these decisions as part of a broader design plan helps connect practical requirements with the look of your home. Jill Rae Designs’ design process brings planning and design details together to support a cohesive result.
Layer ambient, task, and accent lighting for comfort and visibility
Use a combination of lighting to make the bathroom comfortable at different times of day. Ambient lighting illuminates the room as a whole. Task lighting supports activities such as shaving or applying makeup, while accent lighting can draw attention to a detail like a tiled wall or a shower niche.
Consider how the fixtures will work with the room’s surfaces. Dark finishes may make a space feel dimmer, while mirrors and glossy tile can reflect light. Dimmers offer flexibility, but check that they’re compatible with your chosen fixtures and place their controls where they’ll be convenient. If the bathroom has a window, account for changing daylight and privacy needs. Planning the lighting with the layout can help you avoid dark corners and uncomfortable glare.
Position mirror lighting to reduce grooming shadows
Mirror lighting should provide clear, even illumination for grooming. A fixture above the mirror may suit the room, while lights on either side can help reduce shadows across the face. A backlit mirror can add a soft, polished effect, but check whether it provides enough light for tasks such as shaving or makeup.
Choose the mirror and lighting together so their proportions and placement work with the vanity, faucet, and any wall-mounted accessories. In a shared bathroom, a wider mirror or two separate mirrors may make the space easier to use. Also consider what the mirror will reflect, including windows and other light sources. Confirm fixture dimensions and mounting needs before the walls are finished, especially if the mirror or lighting requires electrical connections.
Plan storage for toiletries, linens, cleaning supplies, and everyday essentials
Make a list of what needs to be stored in the bathroom, from daily skincare and hair tools to spare towels and cleaning supplies. Decide which items should be easy to reach and which can go in a less accessible cabinet or elsewhere in the home. This inventory can help you choose a useful mix of vanity drawers, shelves, cabinets, and linen storage.
Think about how the storage will work, not just how much it can hold. Shallow drawers can organize small items, while deeper drawers or cabinets may suit larger products. If several people share the bathroom, give each person a dedicated area where possible. Check how plumbing beneath the sink may affect drawer space, and make sure doors and drawers can open without hitting nearby fixtures.
Free up counter space with recessed niches, medicine cabinets, and built-in organizers
A clear vanity counter makes daily routines easier and gives the bathroom a more composed feel. Recessed medicine cabinets can add storage without projecting as far into the room as surface-mounted options. Built-in drawer organizers keep smaller items in order, while shower niches give bottles a designated place.
Plan these features before construction, since recessed storage depends on what’s inside the wall. Confirm niche depth and placement against framing, plumbing, and the tile layout. In a shower, position shelves within comfortable reach and size them for the products you use. For a medicine cabinet, consider its mirror size, door swing, lighting, and electrical needs. Coordinating these details while finalizing the wall plan helps avoid awkward placement and keeps storage in step with the rest of the design.
Maximize small bathrooms with vertical shelves, tall cabinets, and floating vanities
In a compact bathroom, make use of wall height as well as floor space. Tall cabinets and vertical shelves can add storage without taking up more of the walkway. A floating vanity leaves some floor visible, which can make the room feel more open, but check that it still offers enough practical storage for everyday essentials.
Keep the arrangement simple and suited to the room’s proportions. Place shelves where they won’t crowd the doorway or shower entry, and choose a mirror that fits the vanity and reflects light. Clear shower glass can help maintain open sightlines. Before choosing a floating vanity, confirm that the wall can support it and that its height and depth feel comfortable for the people using it. A thoughtful plan makes movement easier while giving everyday items a proper place.
Choose ventilation that controls humidity and protects finishes
Showers and baths add moisture to the air, so plan ventilation that can clear humidity from the room. Lingering moisture can affect paint, cabinetry, grout, and other finishes over time. Choose an exhaust fan suited to the bathroom, and confirm where it will vent. A quiet fan may be more comfortable to use consistently.
Decide how the fan will be controlled, whether by a standard switch, timer, or humidity-sensing control. Coordinate its wiring and duct route with the ceiling plan and other mechanical systems before finishes are installed. Ventilation works alongside waterproofing and suitable materials; it doesn’t replace them. The EPA’s guidance on moisture and mold explains why moisture control matters in indoor spaces. Ask your contractor to confirm that the fan and installation meet the project’s requirements.
Coordinate outlets, switches, and mirror features with the layout
Plan outlets and switches around the way you use the bathroom. Think about where you’ll plug in a hair dryer, electric toothbrush, or grooming tool, and keep cords away from wet areas. Place switches where they’re easy to reach when entering the room. Separate controls for lighting and ventilation can also make the space more convenient to use.
If you’re considering a lighted mirror or medicine cabinet, confirm its dimensions and electrical requirements before finalizing the wall layout. Check that outlets won’t be hidden by cabinetry or interfere with drawers, faucets, or mirrors. Bathroom electrical work must follow applicable local codes, so review requirements with your contractor and local building department. Coordinating these details with the vanity, lighting, and storage plan helps the finished room feel cohesive and supports smoother daily routines.
What Happens During a Bathroom Renovation?
A bathroom renovation starts with a clear plan and moves through design, construction, installation, and a final review. Early decisions shape the project: how the room needs to function, which layout supports your routines, and where the budget should go. From there, your design and construction team can coordinate the details, including product choices, plumbing, lighting, and finishes. A thoughtful process helps create a bathroom that feels considered, works well every day, and fits naturally with the rest of your home.
Align on goals, scope, budget, and priorities before choosing finishes
Begin with what isn’t working and what you want the renovated bathroom to do better. You may need more storage, a larger shower, easier access, or a layout that works for more than one person at a time. Make a list of essentials, followed by features you’d consider if the budget allows. This gives your design team a practical starting point.
Discuss the project scope and budget before selecting tile, fixtures, or cabinetry. Include labor and materials, and set aside funds for unexpected conditions behind walls or beneath floors. Browsing bathroom inspiration on Houzz can help you identify details you like. Use those ideas to clarify your priorities, then adapt them to your space and plans.
Finalize the layout before selecting fixtures, materials, and lighting
Settle the layout before choosing finishes. Consider who uses the bathroom, how they get ready, and whether you need a tub, a walk-in shower, or both. In a shared bathroom, placing the sink apart from the toilet or shower may make busy mornings more comfortable. The right arrangement depends on the room’s dimensions and your household’s routines.
A designer can help assess clearances, storage, plumbing locations, and the scale of each fixture. Review door swings, shower access, and how drawers and cabinet doors will open. Houzz’s bathroom planning ideas offer examples of layouts and features to consider. Once the plan is approved, you can choose materials and lighting with a clear sense of where each element will go.
Confirm measurements, product availability, and installation requirements
Before ordering, verify the room’s measurements and the dimensions of each selected product. Check walls, doorways, and openings, and make sure large items such as a vanity, tub, or shower panel can be brought into the space. Accurate measurements also help confirm that doors, drawers, and fixtures have enough room to operate comfortably.
Check product availability and lead times early, especially for custom items. A delayed fixture or finish can affect the construction schedule, so your team should confirm when products will arrive and what installation requires. Samples of tile, paint, and countertop materials can help you compare color and texture in your home’s lighting. Review specifications with your design and construction team before placing orders, including any preparation, mounting, or care requirements.
Coordinate plumbing, electrical work, waterproofing, and finish installation
Several types of work need to happen in sequence. Plumbing and electrical plans should match the approved layout, with fixture connections, outlets, switches, and lighting placed where they’re needed. Waterproofing is especially important in showers and other wet areas, since it protects the structure beneath the finished surfaces.
Your construction team coordinates this work before installing tile, cabinetry, and fixtures. They can confirm that the underlying surfaces are ready and that products are installed according to their specifications. Local codes and permit requirements should also be addressed as part of planning. For a functional design, review established bathroom planning guidance with your project professionals. Careful coordination helps connect the design plan to the practical requirements of construction.
Review decisions at key stages to align design and construction
Before construction begins, review the drawings, product specifications, finish selections, and any custom details with your team. During the project, check key milestones such as rough plumbing and electrical work, waterproofing, and tile placement. These reviews give you and your team a chance to confirm that the work matches the plan before the next stage moves forward.
Keep a record of approved products and decisions so everyone can refer to the same information. If you share inspiration images, explain what stands out to you, such as a particular color, storage idea, or tile pattern. That context helps your design team adapt the reference to your bathroom rather than simply copy a look. For example, a tile that suits a spacious bathroom may need a different scale or layout in a smaller room.
Work with a design professional to coordinate details and connect the bathroom to your home’s style
A design professional can bring the project’s many decisions together, from space planning and finish selections to coordination with the construction team. They can help you compare options, identify potential conflicts, and make sure the details support your routines. The relationship between a vanity, mirror, lighting, and tile, for instance, affects both how the room works and how it feels.
It’s also worth considering how the bathroom relates to nearby rooms. Repeating a color, material, or architectural detail can help the renovation feel connected to the rest of your home. Learn more about Jill Rae Designs’ renovation process and design approach to see how personalized planning can guide a project from early decisions through construction.
What Bathroom Renovation Mistakes Should You Avoid?
A bathroom renovation works best when the practical decisions come before the decorative ones. Confirm how the room needs to function, set the project scope, and establish a budget before choosing tile, fixtures, or lighting. This order helps you make confident choices and catch potential issues while they’re easier to address. A clear plan also gives your design and construction team a shared reference point from the first measurements through the finishing details. Jill Rae Designs outlines its collaborative approach to planning and project coordination in its renovation process.
Choose finishes only after confirming the layout and project scope
It’s easy to fall for a beautiful tile or vanity before knowing whether it suits your bathroom. First, decide what the renovation includes: a finish refresh, a new layout, or a more extensive rebuild. Confirm the positions and dimensions of the shower, tub, vanity, and storage, and make sure doors, drawers, and shower entries have enough clearance.
Once the layout is settled, choose finishes that fit the space and your priorities. Look at samples in the room’s natural and artificial light, since colors can appear different from how they looked in a showroom. Measure carefully, and check that large fixtures can pass through doorways and hallways. Use bathroom design ideas for inspiration, then adapt what you like to your home.
Account for costs, timelines, and contingency funds
A bathroom budget should cover more than tile and fixtures. Include design, labor, materials, delivery, plumbing, electrical work, and installation. Separate essential work, such as waterproofing, from optional upgrades, such as specialty lighting or premium finishes. That distinction makes it easier to prioritize if costs shift.
Ask your contractor about the schedule and product lead times before ordering. A delayed vanity or custom shower enclosure can affect the sequence of work. Set aside contingency funds for problems that may only become visible once walls or floors are opened, such as water damage or outdated wiring. Before work begins, agree on how changes will be priced and approved. Planning for both time and unexpected costs helps you make decisions with a clearer picture of their impact.
Plan for storage, ventilation, lighting, outlets, and mirror size
Think through what you use in the bathroom each day and where it should go. Toiletries, towels, cleaning products, and hair tools all need practical storage. Drawers, medicine cabinets, recessed shower niches, and tall cabinets can help keep essentials organized without filling the countertop.
Plan lighting around the room’s different tasks. Ambient lighting provides general illumination, while well-positioned mirror lights make grooming easier and reduce shadows. Confirm outlet locations early, particularly near the vanity, and choose a mirror that fits both the wall and the vanity below it. Ventilation deserves the same attention: an appropriately sized fan helps manage humidity and protect paint, cabinetry, and other finishes. These details are easier to coordinate before electrical and plumbing work begins.
Choose materials for water resistance and maintenance, not just appearance
Bathroom materials need to handle moisture, frequent use, and regular cleaning. When comparing floor and shower tile, consider water exposure, slip resistance, grout upkeep, and cleaning requirements. Porcelain and ceramic are popular options, while natural stone offers distinctive variation but may need sealing and more ongoing care.
Check maintenance instructions before purchasing surfaces, cabinetry, and countertops. Make sure vanity materials are suitable for a humid environment, and confirm that shower finishes are designed for wet areas. Grout and waterproofing matter too, as does the quality of installation. A finish that looks appealing but requires more care than you can comfortably provide may not be the right fit. Choose materials that reflect your style while also matching your household’s routines and maintenance preferences.
Avoid combining too many colors, finishes, or decorative details
A bathroom can feel visually cluttered when every surface demands attention. Choose a clear color palette, then coordinate tile, cabinetry, countertops, fixtures, and hardware around a few related tones or materials. Finishes don’t need to match exactly, but repeating details can help the room feel cohesive.
Consider selecting one or two focal points, such as a patterned floor or a distinctive vanity, and keeping surrounding surfaces simpler. Also plan where everyday products will live before adding decorative accessories. Crowded counters and walls can make a bathroom feel less calm and harder to keep tidy. If you’re choosing among several ideas, gather samples and view them together in the room. That makes it easier to see whether each choice supports the overall design.
Account for added costs and delays before changing plans during construction
A change during construction can affect more than the item you want to replace. Switching tile, fixtures, or the layout may require extra materials or labor, changes to plumbing or electrical work, and adjustments to the installation schedule. A replacement product may also have a longer lead time. Before approving a change, ask your contractor or designer how it will affect the budget, timeline, and other decisions.
Some changes can be worthwhile, particularly when they improve function or address an issue discovered during the work. Make the decision with a clear understanding of the trade-offs. Confirm the revised cost and schedule in writing, and check whether other selections need to change too. Coordinating updates with your design and construction team helps keep the finished bathroom aligned with your goals.
Related Articles
- Renovation vs. Remodel: What’s the Difference and Which One Do You Need? — Jill Rae Designs
- The Value of Interior Design During Your Home Renovation — Jill Rae Designs
- The Power of the Powder Room — Jill Rae Designs
- The Ultimate Guide to Stone Countertops — Jill Rae Designs
- The Invisible Elements of Great Interior Design — Jill Rae Designs
Frequently Asked Questions
How do I know whether my bathroom needs a refresh or a full renovation?
If the layout works and the plumbing, waterproofing, and main fixtures are in good condition, updating finishes, lighting, or hardware may be enough. A full renovation may be a better fit if the room needs repairs, more storage, improved access, or a different layout. Have a design and construction professional assess the space before deciding.
What should I choose first when planning a bathroom renovation?
Start with your household’s needs, the project scope, and the room layout. Once you know how the bathroom should function and where fixtures will go, you can select materials, lighting, and finishes with greater confidence.
How can I keep a bathroom renovation within budget?
Set a spending range, identify essential work, and rank optional upgrades by importance. Ask for estimates that clearly describe what’s included, check product costs and availability, and reserve funds for repairs that may be uncovered during construction.
Do I need a permit to renovate my bathroom?
It depends on your municipality and the work involved. Plumbing, electrical, or structural changes may require permits or inspections. Contact your local building department before construction begins to confirm the requirements for your project.
Which bathroom materials are easiest to maintain?
Maintenance varies by product, finish, and how the room is used. Porcelain and ceramic tile are common choices for bathrooms, while natural stone may require sealing and specific cleaners. Check care instructions and ask your supplier or installer whether each material suits its intended location.