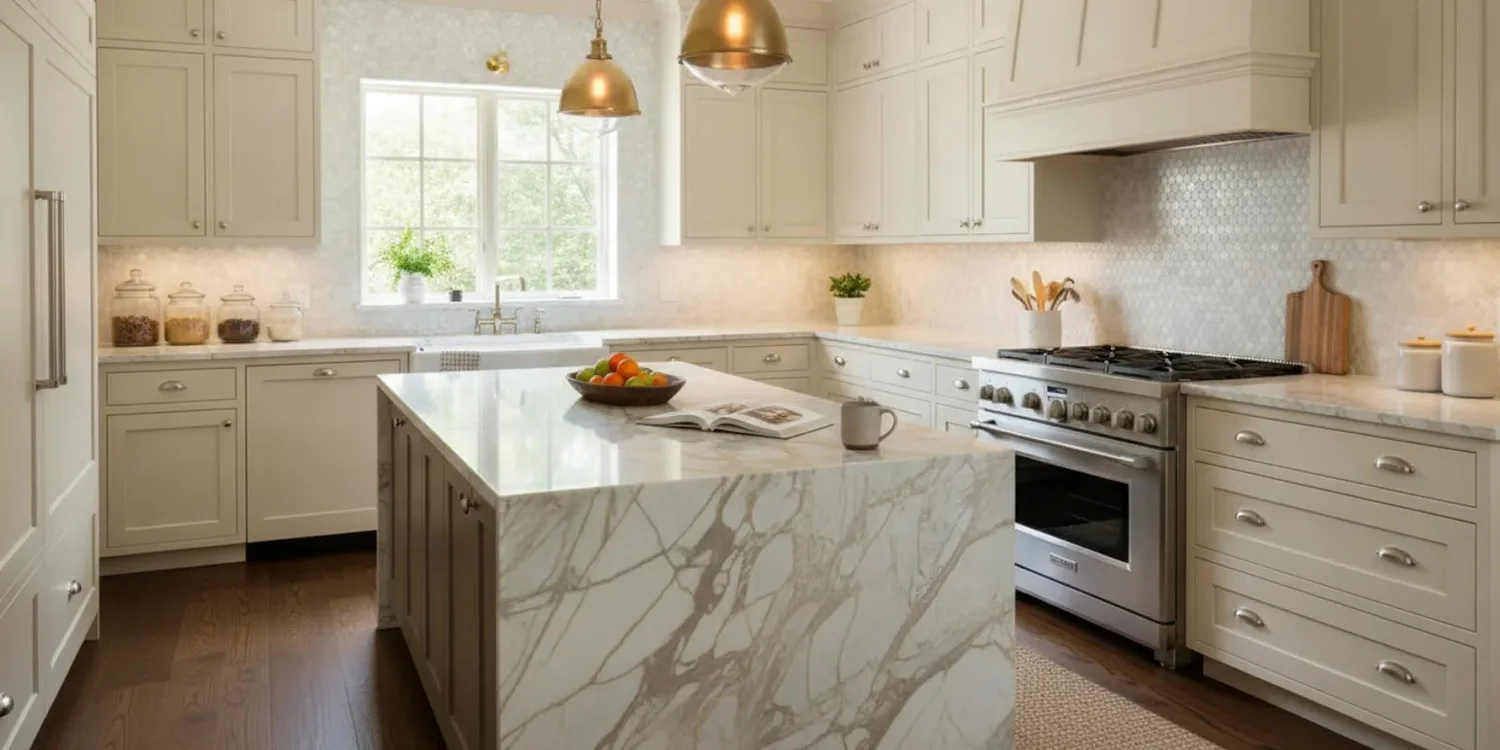
A successful kitchen renovation begins long before cabinets arrive or construction starts. The design phase is where you decide how the room should work, how it should connect to the rest of the home, and which materials will support daily life for years to come. Thoughtful kitchen renovation design brings the layout, cabinetry, lighting, finishes, appliances, and project coordination into one clear plan.
For a luxury homeowner, the goal is rarely just a new set of cabinets. A kitchen may need to welcome guests, support several cooks, provide quiet morning routines, connect to a dining area, or accommodate a home that is changing over time. Planning the design phase well helps you make those decisions in the right order. It also gives your architect and contractors a more useful foundation for the work that follows.
Begin with the life the kitchen needs to support
Start with use rather than appearance. Before collecting images or choosing a countertop, describe what happens in the kitchen on an ordinary day and during the occasions that matter most. The answers will shape the plan more reliably than a trend or a single inspiration photograph.
Write down who cooks, how often meals are prepared from scratch, whether several people work in the room at once, and where family or guests gather. Add the less obvious routines: unloading groceries, making coffee, feeding a pet, sorting mail, charging a device, packing lunches, or setting out food before company arrives. These small repeated actions often determine whether a plan feels natural.
Consider which activities should share space and which should be kept apart. A person preparing dinner may appreciate a clear work surface away from the route guests take to the dining room. Children might need a place for a snack without entering the cooking zone. Someone who enjoys baking may want ingredients, mixing equipment, and a durable preparation surface together. Translate each preference into a design need rather than treating it as a vague wish.
Walk through the current kitchen while it is being used. Notice where people stop, cross paths, set down groceries, and leave items that have no convenient home. For a week, jot down recurring frustrations and successful habits. If everyone naturally gathers around one counter, that may signal a need for a social perch or a larger landing surface. If clutter accumulates near the doorway, the design brief may need an arrival zone or better everyday storage.
Separate essential needs from desirable extras. A useful brief might identify a clear preparation area, storage for a particular collection, improved connection to the dining room, and better light as essentials. A second oven, a beverage station, or display shelving may be preferences to test against space and project scope. Prioritizing helps the design team make trade-offs without losing sight of what matters most.
Read the existing room before changing it
The design phase should begin with an accurate understanding of the home. Measure the room and document openings, ceiling heights, windows, doors, structural elements, plumbing locations, ventilation, electrical conditions, and adjacent spaces. If the renovation involves an older home, investigate existing conditions before treating the current plan as fixed or assuming a move will be simple.
Make a room record that includes more than wall lengths. Note trim, sill heights, ceiling changes, columns, beams, floor transitions, radiators, vents, and the direction each door swings. Photograph the room from each corner and from the hall, dining room, and other viewpoints. A kitchen is experienced in relation to those neighboring spaces, so the views into it matter as much as the view from the sink.
Existing conditions do not automatically determine the new layout, but they affect the decisions, sequence, and coordination required. A window may be central to the character of the room. A stair or load-bearing wall may limit how an island can be positioned. The location of a range hood, sink, or refrigerator may influence mechanical planning. Early documentation makes those constraints visible while there is still time to respond.
Record what should remain, too. A favorite table, inherited piece, artwork, architectural detail, or view may be important even if it is not part of the kitchen itself. Measure furnishings that will stay and consider whether they can pass through doors and fit in the intended location. A renovation should respond to the whole home, not treat the room as an isolated box.
Do not assume that a sketch or old plan is accurate enough for final decisions. A design can begin with available information, but dimensions and site conditions need confirmation by the appropriate project professionals before construction documents and orders are finalized. If a condition is uncertain, mark it as something to verify rather than quietly building an assumption into the plan.
Shape the layout around movement and connection
A kitchen layout is a plan for movement. It should make preparation, cooking, serving, and cleanup feel natural without forcing every activity into one narrow path. Rather than beginning with a preferred island size, test the relationships among the refrigerator, sink, cooktop or range, primary preparation surface, pantry storage, and dining areas.
Map the everyday sequence. Groceries arrive and need a place to land; chilled and dry goods are put away; ingredients are prepared; cooking takes place; food is served; dishes are cleared and washed. Ask whether the route between each step is direct and whether another person can pass or participate without blocking it. A floor plan can look orderly on paper while creating awkward crossings in use.
- Arrival: Where do groceries enter, and where can they be placed before they are put away?
- Storage: Which foods, cookware, dishes, and small appliances need to be near one another?
- Preparation: Is there a comfortable, well-lit surface near the ingredients and tools used most often?
- Cooking: Can the person at the range work without blocking the main route through the room?
- Serving: How will food reach an island, dining table, or another room?
- Cleanup: Can dishes move to the sink and dishwasher without crossing the busiest work area?
Circulation deserves the same attention as cabinetry. A generous island can be useful, but it can also make a room feel crowded if its clearances do not suit the household and appliances. Seating should not interfere with appliance doors, work zones, or the path to an adjacent room. Test door and drawer swings on the plan, and consider where a person standing at an open dishwasher or refrigerator will occupy space. The best dimensions come from the complete plan and household habits, not a universal formula.
Think about how many people need to use the kitchen at peak times. Two cooks may need separate work surfaces or a layout that lets one prepare food while another handles cleanup. A household that usually has one cook may gain more from an uncluttered path and a well-placed serving surface than from extra stations. Guests who gather near the kitchen should have a place to pause that does not put them in the middle of hot pans and open doors.
Use the opportunity to improve the relationship between the kitchen and nearby spaces. Some homeowners want a visually connected plan for entertaining. Others prefer a more defined kitchen with a separate place for prep, serving, or cleanup. Neither approach is automatically better. Consider sight lines, noise, cooking activity, storage needs, and how the architecture of the home supports one arrangement.
Before committing to an island, compare it with alternatives. A peninsula may preserve a more generous route. A smaller worktable can add a softer furniture-like element. A wall of storage might solve a real need without placing another obstacle in the center of the room. Sketch more than one option and judge each by actual movement, not by how familiar it looks in photographs.
Design cabinetry around what belongs there
Cabinetry is both the storage system and a major architectural element. Plan it from an inventory of real possessions rather than a generic list of cabinet types. Note the size and quantity of cookware, serving pieces, linens, glassware, small appliances, pantry goods, recycling, cleaning supplies, and items used only on special occasions.
For each category, ask how often it is used, who needs access, and where it is used. Everyday dishes belong near the dishwasher or serving area if that makes unloading and setting the table easier. Pots and pans should be convenient to the cooking zone. Baking tools may be grouped with ingredients and a suitable worktop. Occasional platters can be stored higher or farther away if access remains practical.
Then decide which items should be visible, concealed, near the point of use, or accessible to guests and children. A drawer for everyday dishes may be more comfortable than upper cabinets. A tall cabinet may be valuable for baking supplies, while a shallow drawer may be better for utensils. Appliance garages, tray dividers, pullouts, and integrated waste storage can help when they solve a specific problem, but each mechanism should earn its place.
Think in zones rather than isolated cabinets. A coffee station needs a place for cups, equipment, and supplies, plus an outlet and a surface that does not interrupt the main preparation sequence. A baking area may benefit from nearby mixing bowls, trays, and dry ingredients. A cleanup zone needs room for dishes before and after washing, with waste and recycling positioned to support sorting. The aim is to make related tasks easy without duplicating storage everywhere.
Review the interior dimensions as well as the exterior appearance. Deep drawers can make heavy cookware easier to see and reach, while shelves may suit items that are light or regularly rearranged. A narrow pullout could be useful in one location but awkward if it competes with a door or appliance. List what will go in each special feature before approving it. This avoids paying visual attention to a clever fitting that does not match real use.
Cabinet planning also includes the parts that are easy to overlook: how doors and drawers open in relation to one another; where outlets are needed; how appliance doors affect movement; where small appliances live both in use and in storage; how tall cabinets meet the ceiling and trim; and how ventilation and lighting fit within the composition. These relationships should be reviewed on elevations and plans together.
Cabinetry should look intentional from the kitchen and from the spaces that see it. Repeated lines, carefully considered reveals, and a clear relationship to doors, windows, and architectural details can make a room feel calm. The objective is not to fill every available wall. It is to provide the right storage while preserving proportion, useful counter space, and ease.
Plan lighting as part of the architecture
Lighting should be resolved during kitchen renovation design, not added after cabinet elevations are complete. The room needs more than one layer because work, conversation, cleaning, and entertaining require different conditions.
Ambient lighting provides overall illumination. Task lighting supports work at counters, sinks, and the range. Accent lighting can draw attention to a backsplash, collection, or architectural detail. Decorative lighting gives an island or dining connection a focal point and contributes to the room’s character. These layers should complement one another rather than compete.
Locate task light where the person working needs it. An overhead fixture behind someone can cast a shadow over the counter; under-cabinet lighting may help at a work surface, provided it is coordinated with the cabinet design. A sink, cooking area, and island may each need different treatment. Consider whether a pendant is primarily decorative, task-oriented, or both, and check that it does not obstruct views or feel too low for the activity.
Review light sources at different times of day. Consider glare on stone or polished surfaces, shadows created by upper cabinets, the appearance of finishes under warm and cool light, and the view from adjacent rooms. Switch locations and dimming should be coordinated with the way the kitchen is used, not merely with fixture locations. Separate controls can allow a bright working setting to become a quieter evening environment.
Lighting also affects how much visual weight cabinetry carries. A softly illuminated glass-front cabinet has a different presence from a concealed storage wall. Under-cabinet light can make preparation easier, but it should be placed so the cabinet and counter work together rather than creating a bright line in the wrong location. Review the lighting plan alongside elevations and material samples, and confirm electrical coordination with the appropriate professionals.
Choose materials as a connected composition
Material selection is more than choosing a cabinet color and countertop. A kitchen includes cabinetry, work surfaces, backsplash, flooring, hardware, plumbing fixtures, appliances, paint, lighting finishes, and often nearby millwork. Each choice should support the larger composition.
Begin with the elements that are hardest to change or most important to the room’s character. Then consider how the remaining selections relate in color, texture, scale, and sheen. A restrained palette can still have depth when it combines varied surfaces and carefully chosen details. A more layered palette benefits from a clear hierarchy so the room does not feel visually unsettled.
Evaluate samples in the actual setting whenever possible. Look at them beside existing floors, adjacent rooms, natural light, and proposed lighting. View samples vertically and horizontally because a surface can look different when installed in its intended orientation. Ask how it will feel to touch, how it may age, and what care it requires. A material may be beautiful in a showroom but unsuitable for a busy preparation area, while another may become more appealing as it develops character.
Consider how each surface will be used. Countertops face cutting, spills, hot cookware, and frequent cleaning, so discuss care and limitations with the supplier rather than relying on appearance alone. Flooring should be considered in relation to adjacent rooms, comfort underfoot, and the household’s cleaning routine. Backsplash material may need to negotiate outlets, corners, windows, and the transition to cabinetry. These practical questions belong in the design conversation before a sample is approved.
Do not overlook transitions. The kitchen should relate to flooring, trim, walls, and furnishings beyond it. If the renovation is part of a larger home project, the palette can establish a connection without making every room identical. Review the kitchen from the entry, dining area, and family spaces as well as from the work zones. The completed room should feel like part of the home rather than a showroom vignette.
Coordinate appliances, plumbing, and ventilation early
Appliances influence the layout, cabinetry, electrical plan, ventilation, and daily experience of the room. Confirm intended models or at least required dimensions and performance needs before finalizing cabinet drawings. A change made late can affect several elevations and service locations.
Discuss the difference between a statement appliance and an integrated one. Consider how refrigerator capacity relates to the household, whether a wall oven improves access, where a microwave belongs, and how a dishwasher can be loaded without disrupting preparation. If a second appliance or separate prep area is needed, plan its storage and services at the same time. Avoid selecting equipment solely by its appearance before checking its requirements and relationship to the plan.
Ventilation deserves particular attention. The hood or ventilation system should work with the cooking equipment, the room’s architecture, and the mechanical conditions of the home. Its size, location, finish, and visual presence can affect the entire range wall. Ask the responsible project professionals to coordinate the system requirements rather than assuming that a decorative hood resolves them.
Plumbing fixtures also have design and functional roles. Sink size, faucet reach, filtration, hot-water delivery, and a secondary prep sink should be considered in relation to the tasks they support. Check the proposed faucet against window sashes, shelving, and wall finishes. Consider where soap, drying, and dish storage will sit so the sink area remains useful rather than crowded.
This is where design coordination matters. An interior designer can develop interior decisions and communicate them with the architect and contractors, while the appropriate licensed professionals address construction, engineering, permits, and trade work. Keeping those responsibilities clear helps the project move forward with fewer assumptions.
Resolve the plan before selecting every detail
Good design does not require every decision to be made on the first day. It does require major relationships to be resolved before details are purchased or construction begins. Establish a decision sequence that protects the layout first, then the components that depend on it.
- Define goals, priorities, and the renovation scope.
- Document the existing home and confirm project constraints.
- Develop and test layout options.
- Coordinate architectural, mechanical, electrical, and plumbing requirements with the appropriate professionals.
- Choose cabinetry style, configuration, and storage solutions.
- Confirm appliance locations, dimensions, and ventilation needs.
- Develop lighting, reflected ceiling, and electrical plans.
- Select and review materials, fixtures, hardware, and furnishings.
- Prepare drawings, specifications, schedules, and a clear scope for the construction team.
- Review lead times, ordering responsibilities, delivery, and installation coordination.
The exact sequence will vary with the home and scope. The principle remains the same: do not let a late finish decision force an early layout compromise, and do not approve a visual selection without understanding its practical requirements. Maintain a decision log with the item, options considered, responsible decision-maker, approval date, and related drawing or specification. This gives the team a shared reference when questions arise later.
For each major choice, record what is settled and what remains open. A cabinet finish may be selected while its hardware is still under review; an appliance family may be chosen while exact models await confirmation. Make dependencies visible. If an unresolved decision affects cabinetry, electrical work, or ordering, identify it promptly instead of allowing it to disappear in a long list of small choices.
Build a useful brief for the design conversation
A focused brief makes the first conversation more productive. Gather a simple record of the household, the home, and the desired experience. Include photographs of the existing kitchen, a rough plan if available, images of adjacent rooms, and examples of spaces that communicate the atmosphere you want. Inspiration images are most helpful when you can explain what appeals to you: the color, proportion, light, storage, or feeling.
Prepare notes on the project scope and rooms that may be affected; the people who use the kitchen and routines it must support; storage frustrations and features that already work; appliances or furnishings to retain; architectural features and views to protect; desired openness, detail, and maintenance; and the timing you are working toward. If there are conflicting preferences among household members, write those down too. A design conversation can help turn them into criteria that can be compared.
It is equally important to discuss project investment honestly and early. The contact questionnaire can help frame a conversation around scope, timing, and the level of involvement needed. Its investment choices concern the prospect’s project, not a design fee or a promise that a particular renovation can be delivered at a stated amount. A design team can give more useful guidance when the brief reflects the complete project rather than only the cabinet portion.
Use the first conversation to clarify process as well as aesthetics. Ask what information would help define the scope, how decisions and reviews are handled, and how design communication connects with the architect and contractors. Jill Rae Designs describes a process that begins with a consultation, then defines a scope-specific contract and uses an online studio for reviews and communication. A completed questionnaire is reviewed by the team before a conversation is arranged; it is not instant booking.
Understand how the design phase connects to construction
The end of design is not simply the moment when a palette looks finished. It is the point at which the plan can be understood by everyone who must act on it. Drawings, elevations, material schedules, appliance information, lighting plans, and specifications should tell a consistent story.
Before construction begins, review what is included, who is responsible for each decision, which items are supplied by whom, and how changes will be handled. Confirm that the appropriate architect, contractor, engineers, and trades have the information they need. If the renovation includes structural changes, permits, or new mechanical systems, those matters belong with the responsible licensed professionals and should be coordinated rather than assumed.
During the project, design involvement may include reviewing selections, responding to questions, tracking furnishings or materials, and coordinating with vendors and the construction team. The precise services depend on the agreed scope. Clear communication at the beginning helps protect both design intent and the practical sequence of work.
Keep one current record of approved decisions and drawings. When a change is proposed, identify what it affects: appearance, dimensions, services, ordering, schedule, or another trade’s work. A seemingly modest change to a sink, for instance, may require a different cabinet configuration or plumbing coordination. The goal is not to discourage revisions, but to understand their consequences before they are made.
Learn from a complete residential design approach
A kitchen rarely succeeds as an isolated collection of finishes. Its proportions, materials, lighting, and circulation should support the home around it. Looking at Jill Rae Designs’ residential projects can help you consider how kitchens relate to dining spaces, living areas, and the character of an existing house. Portfolio examples represent the firm’s work and are not a promise of a particular outcome for another home.
For homeowners considering a broader renovation or new-home interior, understanding the design process is as important as reviewing photographs. Ask how the initial conversation works, how scope is defined, how decisions are reviewed, and how communication continues as a project develops. A thoughtful process gives the design enough time to respond to the real home and the people who live there.
Questions homeowners often ask
When should kitchen renovation design begin?
Begin before construction pricing is finalized and before major materials are ordered. The earlier the layout, cabinetry, appliances, lighting, and material relationships are considered together, the more opportunity there is to resolve conflicts without late changes.
Should I choose finishes before deciding on the layout?
Usually, no. Inspiration images can help establish direction, but the layout should respond first to the room, circulation, storage, and daily routines. Once the plan is sound, finish selections can be evaluated in the correct architectural context.
How much of the existing kitchen should remain?
That depends on condition, function, character, and the goals of the renovation. Some elements may be worth preserving because they support the home’s architecture or hold personal value. Others may limit the new plan or require replacement. The decision should follow an assessment of the complete room rather than a general rule.
Can an interior designer coordinate with my architect and contractor?
Interior design can be developed in collaboration with the architect and contractors involved in a project. The interior designer’s role should be defined in the contract, while architectural, construction, permit, and trade responsibilities remain with the appropriate professionals.
What should I bring to an initial consultation?
Bring photographs, any available measurements or plans, a list of household needs, examples of spaces you like, and a clear description of the renovation’s scope and timing. Include information about furnishings or features that matter to you. A complete brief makes the conversation more specific.
With thoughtful preparation, the design phase turns a collection of kitchen decisions into a coordinated plan for how your home should feel, function, and connect from the first day of construction through years of everyday life.